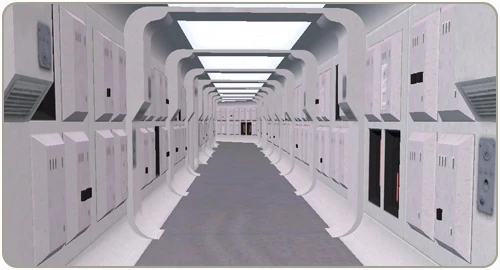
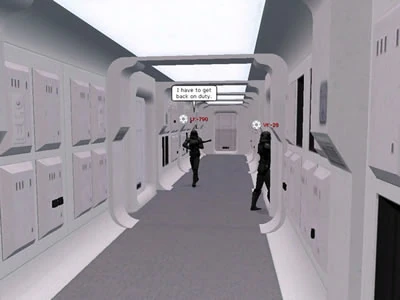
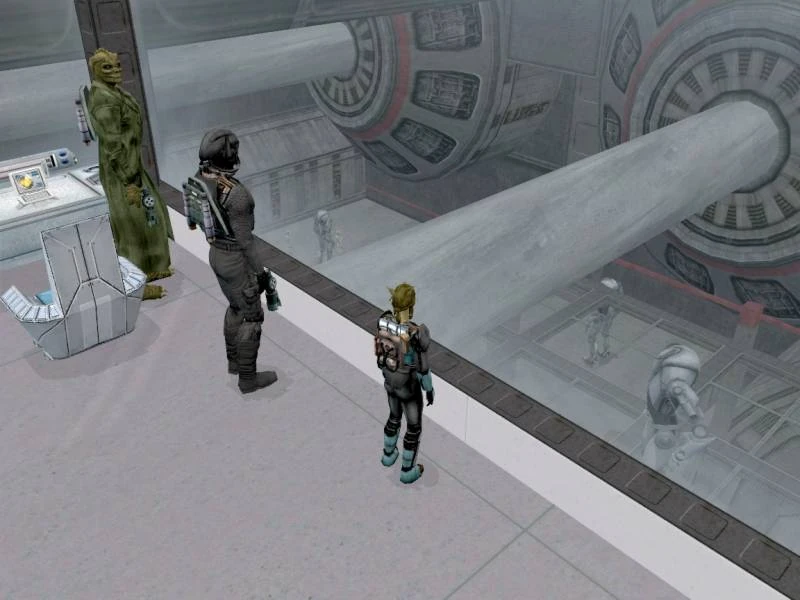
Inside the Corvette
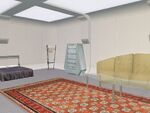
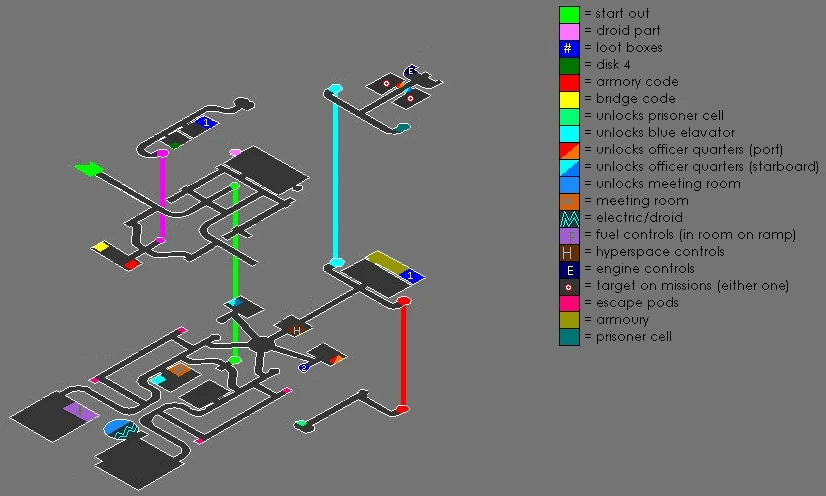
Map of Corvette by Terran Riik
This article is about the Corellian Corvette instanced dungeon. For information on the space ship that pilots must destroy to obtain their Master's skill, see Corellian Corvette (space).
The Corellian Corvette is a instanced dungeon, which means that only your group is up there. You can take a maximum of 8 people up there. There are 9 different missions onboard the Corvette, for Rebels, Neutrals, and Imperials, each of which may choose Assassinate, Rescue, or Destroy missions. Also in the Corvette you can find the Power Plant AV-21, which is required to make an AV-21 Landspeeder. You get the schematic for that vehicle by completing the mission.
Obtain a Travel Authorization Form[]
To enter this dungeon you must first talk to one of the 9 NPC quest givers listed in the missions for Imperials, Rebels, and Neutrals throughout this article. Imperial and rebel contacts will only talk to Combatant or Special Forces representatives of their faction.
They will give you three places to look to get the No-Trade document they need. The container will have "search" in the radial menu. Any Item looted from a container with the "open" option is invalid. Search each location thouroughly, and if no item anywhere in that location is searchable, you may need to talk to the initiator again to get the mission.
You only need to search these locations until you find the appropriate document. All the other No-Trade documents can be turned in for Faction Points for the factional missions (100 FP each), cash for the neutral missions (483 credits), or kept as decorative items.
Imperial Missions[]
Imperial Destroy Mission[]
This ship is on its way to deliver a payload of weapons to a group of Rebels preparing to slaughter outnumbered Imperial soldiers. The Empire would like to simply vaporize it with a nearby Star Destroyer, but fear the political ramifications since the Corvette has been tagged as a medical frigate. Therefore, the dirty work will have to be done from the inside, so as to allay suspicion.
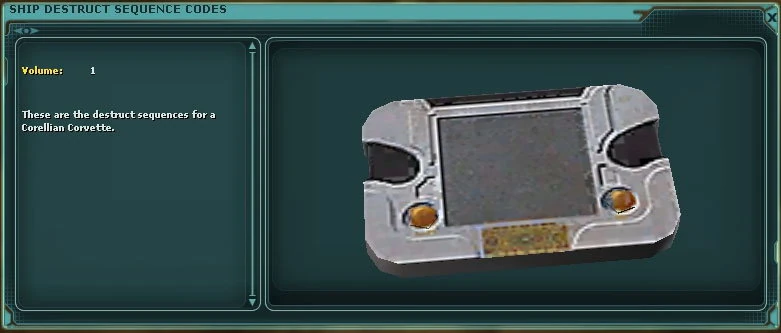
A brash young Imperial officer, who is ambitious and not afraid to show it, believes that he can use these destructive missions to further his political career. He won't like it if his agents fail. Before he can send them, though, he needs the destruct sequence for the ship. He doesn't have it handy, but has some ideas where he can get it. Once the player brings him the codes he will send them to the Corvette to do their job.
Ship Destruct Sequence Codes
/way naboo 2405 -3967 Lt. Velso (Emperor's Retreat) - Imperial Destroy Mission;
You need to find a Ship Destruct Sequence Codes in one of those 3 locations:
/way dantooine 7197 -4090 Drum at the bottom of the Janta Stronghold;
/way talus 2143 -5649 Table in Erran Sif's Bunker;
/way corellia -2659 3003 Small metal box in the Afarathu Cave;
/way tatooine 134 -5349 Container next to the Rebel recruiter in the Anchorhead cantina;
The Afarathu Cave replaced the Anchorhead cantina sometime after Chapter 5.
Imperial Assassination mission[]
Imperials will be sent to the Corvette to eliminate a Rebel officer of high rank. Assassinating the Rebel will be a difficult task because the Corvette will be well guarded and filled with traps and locked doors.
Lt. Sabol is an Imperial Officer who sees no reason Rebel officers should be allowed to live. Women are a rarity among Imperial officers, but she will be cold and ruthless as any male. She will not tolerate failure.
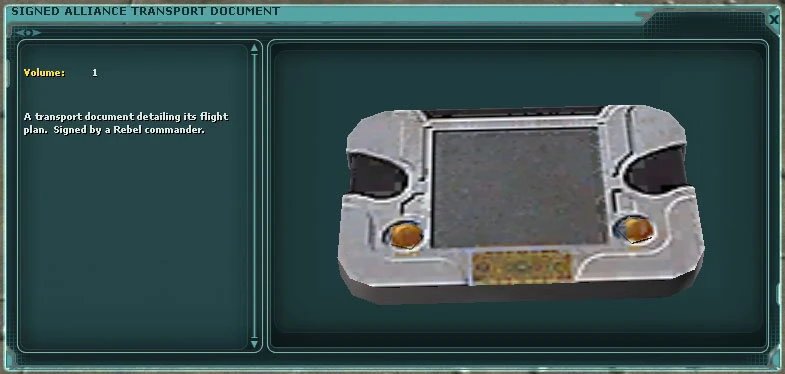
Her current problem is that she's in charge of gathering information for her superiors and her underlings have proven useless time and time again. What she needs is someone to steal Rebel documents for her.

Signed Alliance Transport Document
/way tatooine -1291 -3539 Lt Sabol (Bestine) - Imperial Assassination Mission;
You need to find a Signed Alliance Transport Document in one of those 3 locations:
/way dathomir 5696 1952 In the Dathomir Crash Site;
/way dantooine -6676 5557 Black container in the Abandoned Rebel Base;
/way Corellia -2659 3003 Small Metal Storage Crate in Afarathu Cave;
/way tatooine 134 -5349 Container next to the Rebel mission terminals in the Anchorhead cantina;
The Anchorhead cantina replaced the Afarathu Cave sometime after Chapter 5.
Note: This mission may be bugged. The general you need to kill does not spawn, however it appears that as long as you get to the part where he should spawn, on ejecting from the corvette you still get the completed mission message and badge, and can claim the reward.
Imperial Rescue mission[]
There are some scientists who agree whole-heartedly with the Empire's xenophobic views of the universe. One of these is Dr. Bledsoe, an Imperial expert in the field of disease and medicine. Dr. Bledsoe has been abducted by a group of Alliance terrorists, and is being whisked away for questioning at one of the Rebel insurgence camps. Someone must rescue him before it's too late.
An Imperial colonel who is on the verge of retirement heads the rescue operations. He feels it is his duty to make sure all Imperial hostages are freed before he gives up his post. The Colonel needs a group of ragtag Imperial supporters to board the Rebel blockade runner and make sure that Dr. Bledsoe is freed before any harm befalls him. Who knows what those ruthless Rebels will do to a poor scientist who can't even defend himself properly?

Prisoner Transport Order
/way tatooine -5313 2662 Colonel Darkstone (Imperial Oasis) - Imperial Rescue Mission;
You need to find a Prisoner Transport Order in one of those 3 locations:
/way lok 3205 -4873 Storage crate at the bottom of the Droid Engineer's Cave, left wing;
/way yavin4 580 -695 Small Storage Drum in the Woolamander Palace;
/way corellia 5229 1592 Storage Crate Rogue CorSec Base;
/way dantooine -7065 -3326 Damaged Metal Drum in the Mokk Stronghold;
The Mokk Stronghold replaced the Rogue CorSec Base sometime after Chapter 5.
Neutral Missions[]
Neutral Destroy Mission[]
One of Jabba's minions has betrayed him, spilling valuable information in order to lessen his sentence. This information is currently stored on a hard disk and is on a CorSec transport on its way to a council of Galactic Judges. Jabba can't possibly let that ship make it to its destination. It's your job to make sure it doesn't. Jabba will pay handsomely for the destruction of that ship, but before anyone can even get to it, there will be some work involved. Jabba knows the ship in question, and knows that he needs destruct sequences to destroy it. He has some ideas where he can get that information.

Corsec Destruction Code Sequences
/way tatooine -5880 –6220 Bruce McBrain (Jabba's Palace);
You need to find a Corsec Destruction Code Sequences in one of those 3 locations:
/way naboo 2911 1099 Chest in the Mauler Stronghold;
/way corellia 5231 1593 Desk at the bottom of the Rogue CorSec Base;
/way dathomir 2475 -1541 Damaged Metal Drum in the Nightsister Forced Labor Camp, left wing;
Neutral Assassination mission[]
A Rebel commander with the Alliance has a gambling problem and has repeatedly failed to pay off his debts to Jabba. Jabba, not happy with the situation, has placed a bounty on the man's head. He thinks he's safe because as a Rebel he maintains a low profile anyway, but it won't help him this time. Bronell, the Mon Cal, has decided that he will collect the bounty on this Rebel commander, but first he needs to find a group of hired guns who can actually do the task for him, since he's something of a coward. He is smart though, and knows a few things about the Rebel in question, so he should be able to help his agents find him if they follow his instructions. Bronell knows, for example, that Jabba isn't the only person the Rebel owes money too. He's found out through various underground sources that a group of pirates also took some bets for him, but unlike Jabba's unimaginative underlings, these pirates actually kept up with where the Rebel went. They don't want him dead just yet (he doesn't owe them as much as he owes Jabba) and they don't want Jabba killing him either (how will he pay them when he's dead?) so they're keeping the information for themselves.
Debt List
/way tatooine -5914 -6232 Bronell (Jabba's Palace);
You need to find a Debt List (Gambling) in one of those 3 locations:
/way talus 5569 -4065 Desk in the Binyare Pirate Bunker;
/way naboo -1517 -1719 Damaged Metal Drum at the Naboo Pirate Bunker;
/way lok -3893 -3800 Storage Crate at the Canyon Corsair's Stronghold;
Neutral Rescue mission[]
Jabba the Hutt is not happy. One of his top assassins has been captured on Corellia and will be transferred to the prison on Dathomir as soon as possible. Jabba wants this Trandoshan named S'lee rescued, if for no other reason then because he is worried that the man will trade secrets about Jabba's organization in order to lessen his sentence. Jabba has put one of his most trusted lieutenants on the case, a Zabrak known as Yondalla. She's a tough customer, and she needs some shady characters to find out when and on which ship Jabba's assassin is being transported. Once her hired guns have found the information and handed it in to her, she will send them to the Corvette.
/way tatooine -5150 -6588 Yondalla (Wayfar cantina);
You need to find a Corsec Prisoner Transfer Document in one of those 3 locations:
/way talus -4821 -4744 Damaged Metal Drum at the bottom of the Kahmurra Biogenetic Research Station;
/way endor 2134 3686 Damaged Metal Drum in the Korga Cave, right wing;
/way corellia 1414 -316 Bookcase in the Nyax's Cult bunker, before you get to Lord Nyax's room
/way rori 5452 5025 Bookcase in the Cobral Hideout;
The Cobral Hideout replaced Lord Nyax's bunker sometime after Chapter 5.
Note: If you find documents named A galaxy befuddled by A. Rahring or Galactic phrasebook and travel guide, try another location.
Rebel Missions[]
Rebel Destroy Mission[]
The Imperials have struck upon a brilliant political maneuver. They've stolen a Rebel blockade runner, filled it with explosives, and are planning to send it hurtling into Centerpoint Station near Corellia. The plan being, make the Rebels look both foolish and dangerous at the same time. They plan to use this maneuver to force the hands of Rebel sympathizers and to garner political support in the Press. Rebel spies found out about the operation just as it started, and now it's time to do something about it quickly.
Master Sergeant Crowley is in charge of this operation, and she's definitely the woman for the job. She knows it will take some time for the Empire to rig the ship, and to acquire all the explosives they need and have them transported. She needs to use the time wisely though, in order to get her agents to the Corvette before anything goes wrong.
Ship Preparation Document
/way corellia -3404 3092 Master Sergeant Crowley (Kor Vella);
You need to find a Ship Preparation Document in one of those 3 locations:
/way lok -1891 -3032 Small Metal Storage Crate at the Lok Imperial Outpost;
/way dathomir -6308 754 Small Storage Drum at the Dathomir Imperial Prison;
/way rori 5451 73 5024 Bookcase 2nd floor down in the Cobral Hideout;
/way corellia 5229 1592 Storage Crate at the Rogue CorSec Base bottom floor.
The Rogue CorSec Base replaced the Cobral Hideout sometime after Chapter 5.
Note: If you find documents named Imperial Memorandum or Paid Time Off, try another location.
Rebel Assassination mission[]
A particularly ruthless Imperial commander has been on the Alliance's list of priorities since almost the day he was promoted. He's infamous within the Alliance for butchering anyone and everyone in his way, and for using the most extreme torture methods available. Rumor has it he was directly involved in the creation of teh e ITO prototypes. Now he's gone a step further; he's actually overtaken a Rebel blockade runner, eliminated the entire crew, and plans to crash the ship into a suspected Rebel city on the surface of Tralus.
Pashna Starkiller has finally broken down and realized that the only way to deal with someone as ruthless as the Imperial is to assassinate him. Pashna isn't happy about this decision, but given the circumstances it seems to be the best course of action. Of course, the primary objective of the Rebels should be stopping the blockade runner before it crashes into Tralus, but as a secondary objective, the assassination of the Imperial should be looked into.
Imperial Dossier
/way corellia 6772 -5697 Pashna Starkiller (Bela Vistal);
You need to find an Imperial Dossier in one of those 3 locations:
/way yavin4 -6332 -476 Professor's Desk in the Geonosian Caves;
/way tatooine -3978 6259 Small Metal Storage Crate in the Fort Tusken cave;
/way corellia 1353 -329 Bookcase at the bottom of Lord Nyax's Cult bunker;
/way dantooine -7065 -3326 Damaged metal drum in the Mokk Stronghold;
Lord Nyax's bunker replaced the Mokk Stronghold sometime after Chapter 5.
Notes: If you find documents named Prisoner Transfer Orders or Recall Notice, try another location.
The Yavin location will have you encounter CL80 elites, sometimes several at the same time. You will also need a code for each door the 1st code will be 32281, the 2nd door code is 12872 and the 3rd door 51892.
Rebel Rescue mission[]
CorSec officers have arrested a Rebel under the suspicion of terrorist activities. The Empire has gone out of their way to implicate him and plant false evidence of his treason and guilt. The Alliance's only hope is to rescue him before the CorSec ship reaches its destination, Dathomir, where he will be tried and placed in the Imperial Prison there. The ship is almost entirely manned by the Imperials at this point, since they've taken command of the ship as a prisoner transport. Only a small group of CorSec officers (all loyal to the Emperor) remain on board.
Adar Tallon is concerned for the safety of the Rebel, since he's a well-liked, highly-decorated Alliance pilot. The Empire used CorSec to arrest him under false pretenses and he wants to get him back before they do something horrible to him in the Dathomir Prison. The problem is, Tallon needs the security override codes in order to be able to get close to the CorSec ship. He can't get them from CorSec because they're still convinced the man actually is a criminal. CorSec has been somewhat sympathetic to the Alliance so Tallon doesn't want to directly involve them in either clandestine operations or a direct attack. He's looking for some Rebel help...


Security Override Codes
/way corellia -5448 -2674 Adar Tallon (Tyrena);
You need to find the Security Override Codes in one of those 3 locations:
/way dantooine -526 -3870 Table in the second floor room of The Warren;
/way lok 3658 2185 Chest in a small room near the Downed Blood Razor's Transport;
/way dathomir -6352 749 Storage crate at the Dathomir Imperial Prison;
Getting Ready[]

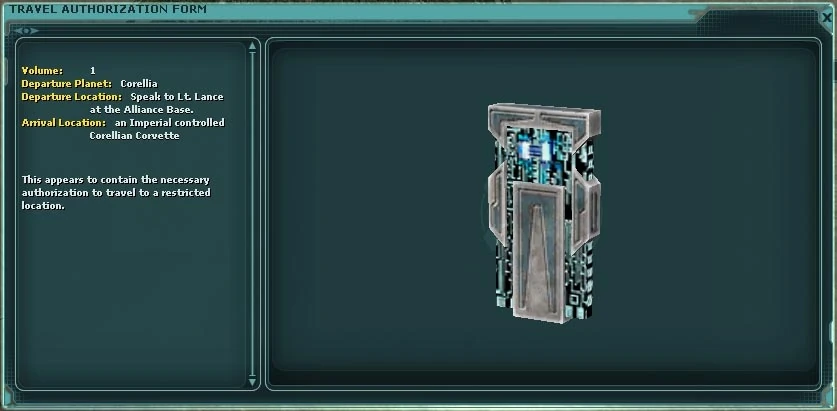
Rebel Travel Authorization Form
After returning to the initiating NPC, turn in the required document. The NPC will give you a Travel Authorization Form.
Go to the appropriate shuttle contact and talk to him to enter the instance.
/way naboo 2447 -3898 DS-297 (Emperor's Retreat) - Imperial contact;

/way tatooine -6178 -6381 Klaatu (Jabba's Palace) - Neutral contact;

/way corellia -6519 6044 Lt. Lance (Hidden Rebel Base) - Rebel contact;
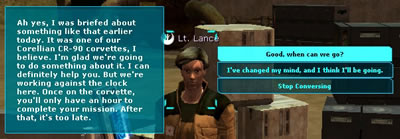
At that point the rest of the group is asked if they want to go.
Notes:
- You have one hour to comlete your objectives.
- A Medical Droid has been added to cure cloning sickness.
Destroy Mission[]


There are 6 things to do in order to complete this quest:
- Get the codes
- Unlock the Elevator
- Set the Fuel
- Set the Hyper Drive
- Set the Engines
- Use the Escape Pod
Get the Codes[]
The only required code for this particular mission is The Bridge Code, it is obtained by....
From the beginning of the ship, make the first right, take it to the juncture, make a left to the elevator, take it up, make the first right, open the chest in this room to get OPERATIONS DISK #4.
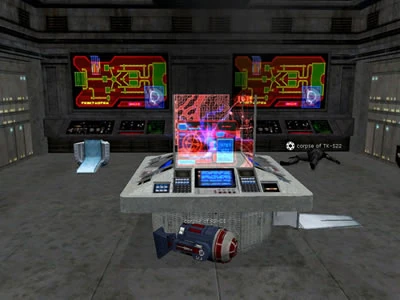
Take the elevator back down, go straight across into the "computer room" turn right. In the far left corner is a computer, use the disk to restart it, then use the computer again to obtain the Bridge Code.
- Smugglers can bypass this section of the instance by slicing the main terminal in the Computer room to obtain access codes for the Bridge of the ship.
Unlock the elevator[]
This can be a little "tricky" and time consuming.[]
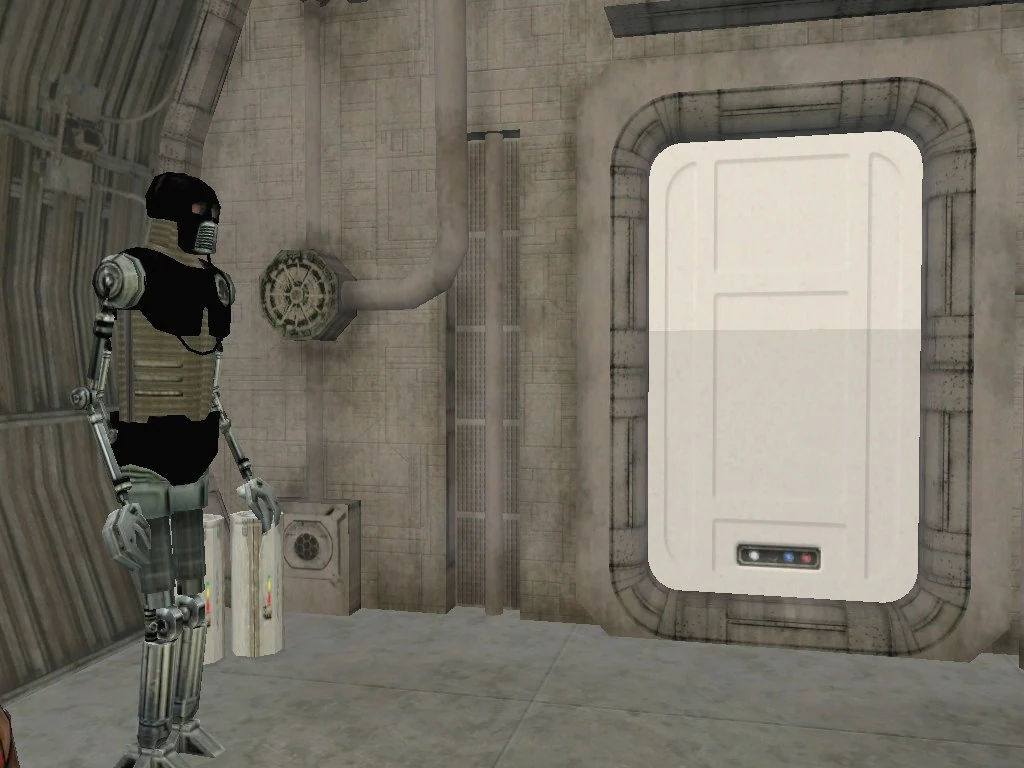
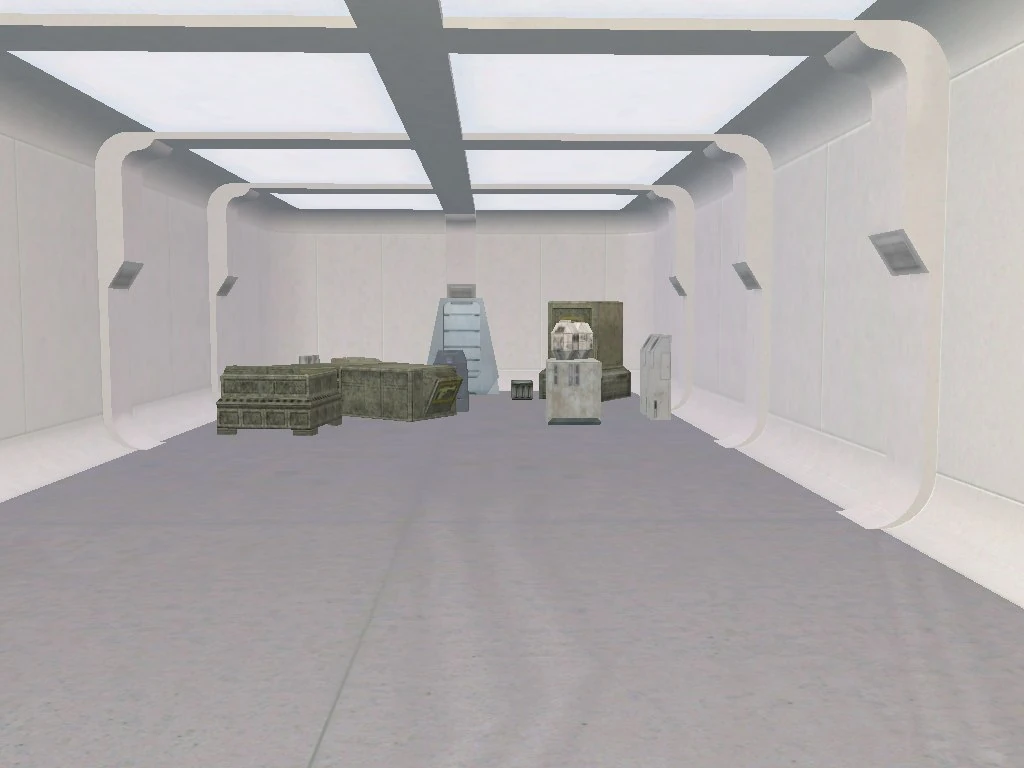
Make your way to the Large room at the forward most part of the main level. To get there take the first door on your left from the starting point and follow the hall behind that door to the right to the white door at the end. Through that door turn right and take the first door on the left.
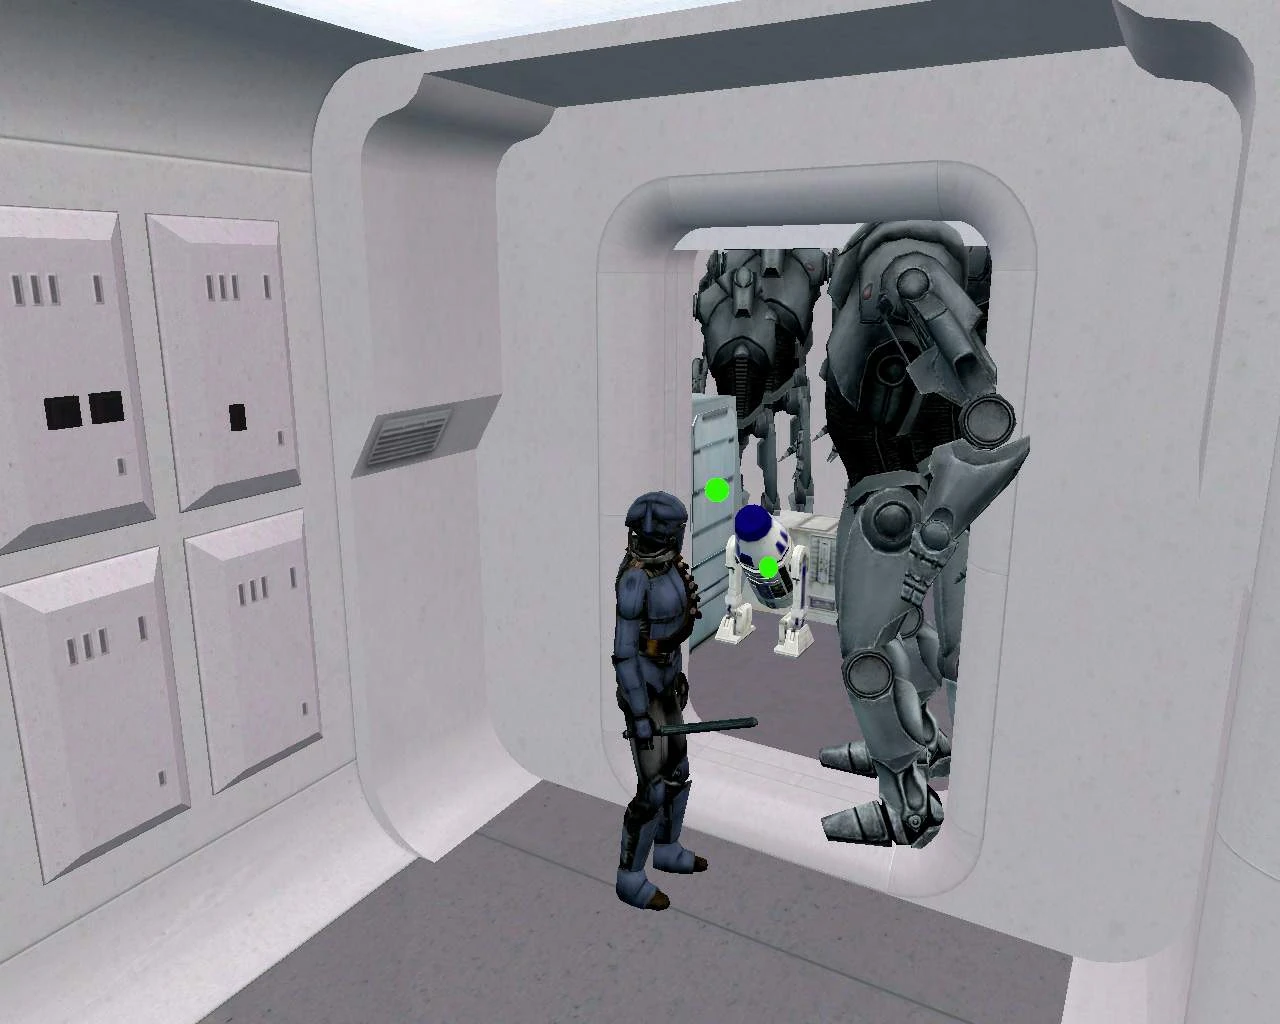
You will find yourself in a large room. As you walk through the door there is a small closet to your left. Inside the closet is a Droid with spare parts in it. Take those parts by targeting it and typing /open, then head to the lower level.
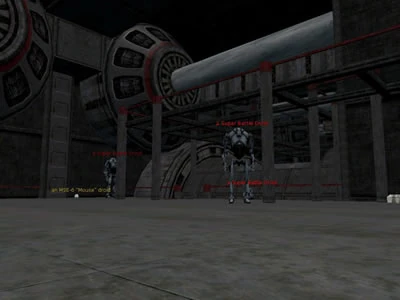
You get to the lower level by (from your original spawn point) heading straight and following the hallway until you reach an elevator. Take it down. Off the elevator on the lower level take a left and follow that hall all the way back to the starboard engine room. There are several Super Battle Droids in this room, so be careful or be quick. There is a small ramp to the right as you walk in the starboard engine room. Walk down the ramp and you will see a door with a broken R4 droid behind it. Drag the spare parts from your inventory and drop them on the droid. You cannot be in combat for this. The droid will activate and move in to deactivate an electrical field around a terminal. Use the terminal once the field is deactivated and it will give you the code to the Meeting Room.
- You could also try to run across the electrical field and use the terminal quickly before you get incapped. Difficult, but possible.
Head back to the elevator and pass it to the port side of the lower level. The first door on the left as you walk down the port hallway is the Meeting room. Open the door and use the elevator control terminal. A system message lets you know that the elevator is now unlocked.
- Note: You will have to unlock this elevator for every mission
Set the Fuel[]
The Fuel Terminal needs to be set to the HIGHEST setting.....when it is clicked a popup will come up with 3 numbers at the bottom, something like 40 60 80 no matter what numbers come up, always choose the HIGHEST one
the Fuel Terminal is located at: from the beginning...go straight.....take the elevator going down....make a right off the elevator, take the first right, then a left into the hallway....take this straight into the SBD room....take the stairway there up, cross the platform and go into the room there....the Fuel Terminal is located at the back of this room
Set the Hyper Drive[]
The Hyper Drive needs to be set to the LOWEST setting.....you will see a similar popup to the one for the Fuel....except this time choose the LOWEST number
the Hyper Drive is located at: from the beginning...go straight.....take the elevator going down....make a right off the elevator, take the first right, turn right, and take the tunnel going toward the front of the ship....this leads to a circular room with 5 halls leading off it... take the hall leading straight up....the Hyper Drive is located in this room to the right
Set the Engines[]
The Engines need to be set to the LOWEST setting.....you will see a similar popup to the one for the Fuel....except this time choose the LOWEST number
the Engine is located at the Bridge : from the beginning...go straight.....take the elevator going down....make a right off the elevator, take the first right, turn right, and take the tunnel going toward the front of the ship....this leads to a circular room with 5 halls leading off it... take the hall leading straight up....into the Hyper Drive room.....continue straight forward down the long hallway, at the juncture make a left. At the end of the hallway you will find an elevator. This is the elevator you unlocked earlier, take it up.. off the elevator go left, and make the first left....there is another hallway here with doors that have keypads on either side, and a door at the end. Go to the door at the end, use the keypad here, input the Bridge Code you acquired at the beginning, inside the next room on the left is the Engines Control
MISSION COMPLETE
Use the Escape Pod[]
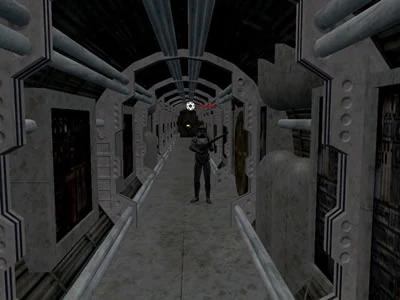
Simply use the first escape pod you come across to exit the ship, they are the big yellow buttons found at the ends of the long dark corridors located along the edges of the ship. If you are unsure of where to find one... From the Cloning Location make the first available left. You will enter the port side of the ship and will see "Escape Pod Controls" at either end of the hall. You will be rewarded the badge for the mission if you eject after the mission is complete and before the time runs out. Naturally, you can only receive the badge once no matter how many times you do the mission.
[]
Return to the NPC who gave you the mission.[]
You will be commended and will receive an AV-21 Landspeeder (Schematic). All members of your party who ejected after the mission was complete and before the time limit will receive a schematic. That is a possibility of 8 schematics per successful mission.
Assassination Mission[]
There are four things to do in order to complete this quest:
- Get the Portside code
- Unlock the Elevator
- Kill the General
- Use the Escape Pod
Get the Portside Code[]
The only code required for this mission is The Portside Code, it is obtained by.... from the begining...go straight.....take the elevator going down....make a right off the elevator, take the first right, turn right, and take the tunnel going toward the front of the ship....this leads to a circular room with 5 halls leading off it... take the upper RIGHT most hall, make a LEFT, enter the room and use the computer located here to obtain the Portside Code.
Unlock the elevator[]
This can be a little "tricky" and time consuming. Make your way to the Large room at the forward most part of the main level. To get there take the first door on your left from the starting point and follow the hall behind that door to the right to the white door at the end. Through that door turn right and take the first door on the left. You will find yourself in a large room. As you walk through the door there is a small closet to your left. Inside the closet is a Droid with spare parts in it. Take those parts by targeting it and typing /open, then head to the lower level.
You get to the lower level by (from your original spawn point) heading straight and following the hallway until you reach an elevator. Take it down. Off the elevator on the lower level take a left and follow that hall all the way back to the starboard engine room. There are several Super Battle Droids in this room, so be careful or be quick. There is a small ramp to the right as you walk in the starboard engine room. Walk down the ramp and you will see a door with a broken R4 droid behind it. Drag the spare parts from your inventory and drop them on the droid. You cannot be in combat for this. The droid will activate and move in to deactivate an electrical field around a terminal.
Use the terminal once the field is deactivated and it will give you the code to the Meeting Room. You could also try to run across the electrical field and use the terminal quickly before you get incapped. Difficult, but possible. Head back to the elevator and pass it to the port side of the lower level. The first door on the left as you walk down the port hallway is the Meeting room. Open the door and use the elevator control terminal. You will receive a system message letting you know you have unlocked the elevator.
- Note: You will have to unlock this elevator for every mission, so you may want to get used to this process.
Kill the General[]
The General in question here varies in name based on Faction.
He is located at: from the begining...go straight.....take the elevator going down....make a right off the elevator, take the first right, turn right, and take the tunnel going toward the front of the ship....this leads to a circular room with 5 halls leading off it... take the hall leading straight up....into the Hyper Drive room.....continue straight forward down the long hallway, at the juncture make a left... at the end of the hall you will find an elevator. this is the elevator you unlocked earlier, take it up.. off the elevator follow the hall to the first left....there is another hallway here with doors that have keypads on either side, and a door at the end. Go to the first door on the left, use the keypad here, input the Portside Code you aquired at the beginning, inside the next room is the General, he usually has other NPCs in the hall and in the room with him. You only need to kill the general for the mission to be completed. Kill the general.
MISSION COMPLETE
Use the Escape Pod[]
Simply use the first escape pod you come across to exit the ship, they are the big yellow buttons found at the ends of the long dark corridors located along the edges of the ship. If you are unsure of where to find one... From the Cloning Location make the first available left. You will enter the port side of the ship and will see "Escape Pod Controls" at either end of the hall. You will be rewarded the badge for the mission if you eject after the mission is complete and before the time runs out. Naturally, you can only recieve the badge once no matter how many times you do the mission.
Return to the NPC who gave you the mission.[]
You will be commended and will recieve an AV-21 Landspeeder (Schematic). All members of your party who ejected after the mission was complete and before the time limit will recieve a schematic. That is a possibility of 8 schematics per successful mission.
Rescue Mission[]
Basically there are 4 things to do in order to complete this quest: Unlock the Elevator, Get the Prison Cell Code, Talk to the Prisoners, Use the Escape Pod
Unlock the elevator[]
This can be a little "tricky" and time consuming. Make your way to the Large room at the forward most part of the main level. To get there take the first door on your left from the starting point and follow the hall behind that door to the right to the white door at the end. Through that door turn right and take the first door on the left. You will find yourself in a large room. As you walk through the door there is a small closet to your left. Inside the closet is a Droid with spare parts in it. Take those parts by targeting it and typing /open, then head to the lower level. You get to the lower level by (from your original spawn point) heading straight and following the hallway untill you reach an elevator. Take it down. Off the elevator on the lower level take a left and follow that hall all the way back to the starboard engine room. There are several Super Battle Droids in this room, so be careful or be quick. There is a small rap to the right as you walk in the starboard engine room. Walk down the ramp and you will see a door with a broken R4 droid behind it. Drag the spare parts from your inventory and drop them on the droid. You cannot be in combat for this. The droid will activate and move in to deactivate an electrical field around a terminal. Use the terminal once the field is deactivated and it will give you the code to the Meeting Room. You could also try to run across the electrical field and use the terminal quickly before you get incapped. Difficult, but possible. Head back to the elevator and pass it to the port side of the lower level. The first door on the left as you walk down the port hallway is the Meeting room. Open the door and use the elevator control terminal. You will recieve a system message letting you know you have unlocked the elevator.
- Note: You will have to unlock this elevator for every mission, so you may want to get used to this process.
Get the Prison Cell Code[]
The only code required for this mission is The Prison Cell Code, it is obtained by.... from the begining...go straight.....take the elevator going down....make a right off the elevator, take the first right, turn right, and take the tunnel going toward the front of the ship....this leads to a circular room with 5 halls leading off it... take the hall leading straight up....into the Hyper Drive room.....continue straight forward down the long hallway, at the juncture make a right....
continue on until you get to an elevator going down, take the elevator down, follow the hallway, make a left, go down the long passage and into the dark room there, then use the terminal in here to the right to get the code
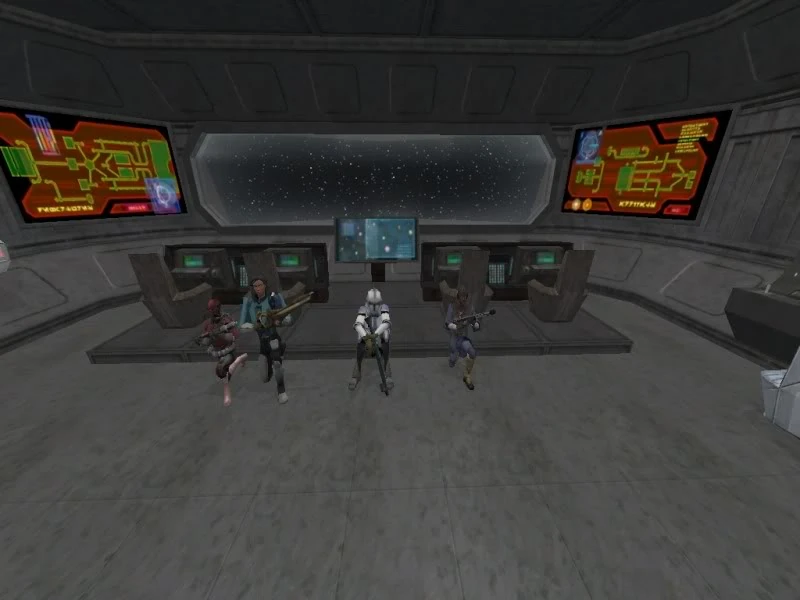
Talk to the Prisoners[]
First you need to unlock the Prison Cell using the code then go in and talk to each prisoner
The Prison Cell is located at: from the begining...go straight.....take the elevator going down....make a right off the elevator, take the first right, turn right, and take the tunnel going toward the front of the ship....this leads to a circular room with 5 halls leading off it... take the hall leading straight up....into the Hyper Drive room.....continue straight forward down the long hallway, at the juncture make a left....
this is the elevator you unlocked earlier, take it up.. off the elevator go left, continue on to the end of the hall, there is a door with a keypad here
use the keypad, input the Prison Cell Code you aquired at the beggining, inside the next room are the Prisoners, talk to each one here
MISSION COMPLETE
Use the Escape Pod[]
Simply use the first escape pod you come across to exit the ship, they are the big yellow buttons found at the ends of the long dark corridors located along the edges of the ship. If you are unsure of where to find one... From the Cloning Location make the first available left. You will enter the port side of the ship and will see "Escape Pod Controls" at either end of the hall. You will be rewarded the badge for the mission if you eject after the mission is complete and before the time runs out. Naturally, you can only recieve the badge once no matter how many times you do the mission.
Return to the NPC who gave you the mission.[]
You will be commended and will recieve an AV-21 Landspeeder (Schematic). All members of your party who ejected after the mission was complete and before the time limit will receive a schematic. That is a possibility of 8 schematics per successful mission.
Looting the Corvette[]
There are four loot drops in total on the Vette; three Armoires and a defunct droid (not the parts droid used to unlock the elevator).
To get to these drops follow these instructions:
- Loot Drop 1:

Loot Armoire #1
From the Begining, make the first right, go straight, take a left and enter the elevator going up, go straight off the elevator and make the SECOND right, this room is filled with SBD's and has an armoire on the far wall, Loot it

Droid #2 and Armoire #3
- Loot Drop 2 & 3:
From the begining, go straight and take the elevator down.
Go right, then turn right, and follow the passage to the circular room with 5 halls leading off it.
Take the upper right hall and at the end of it turn right, go into the little closet room there.
It is filled with SBD's and there is an Armoire here, and the Defunct Droid, loot them both.Since the Defunct Droid do not show any radial menu, you need to target it and use the command /open to loot it from pop up window.
- Loot Drop 4:
Loot Armoire #4
This is the hardest to get to as it requires a passcode, The Armory Code
To get it go, from the begining, make the first right, go straight, make a right and enter the "computer room" turn left and check the right most computer for the Armory Code
To get to the Armory, go, from the begining, go straight, take the elevator down, go right, turn right again, take that to the circular room with the 5 hallways, take the top most hallway leading toward the front of the ship, go straight, at the crossway keep going straight into a large room, on the far wall behind a wall of lockers or crates is a door that has a keypad on it, use the Armory Code here, enter the armory and turn right, on the far wall is another Armoire, loot it
- Usually in these drops you'll get low level loot. Found so far in these containers are:
- There is a few rare loot drops and this is the point of doing this mission more than once:
- Power Plant AV-21
- Rebel Alliance Shirt (Rebel Corvette Missions)
- Rebel Chest Plate (Rebel Corvette Missions)
- Beserker Rifle Schematic (Imperial Corvette Missions)
- Beserker Rifle Stabilizer (Required to craft the Berserker Rifle) (Imperial Corvette Missions)